
The Brewery
We recently, and for the first time, documented a brewday at the Wagner Brewing Company. We were making a Belgian-style witbier called the Big O. This was also the first brewday for my lovely assistant. I think she enjoyed it, and I couldn’t have done it without her. (Couldn’t have done the math, at least.) On to the tour!
The Process

Mashing
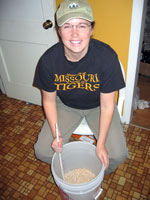

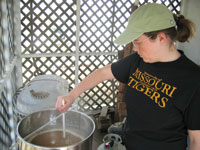
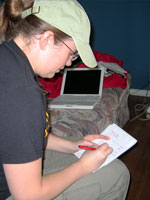
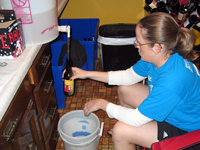
The first step in a all-grain or mini-mash brew day is to combine the malt bill. For this recipe, that includes cracked malt (pilsner, crystal, and wheat) and oat flakes. Jessica is doing the honors in the first photo. Water is heated in order to bring the malt and water up to proper mashing temperatures where naturally occuring enzymes can break down the starches in the malt kernels into simple sugars. This first volume of water is called strike water. This step is called mashing in or doughing in. (Brewing has a lot of specific terms.)
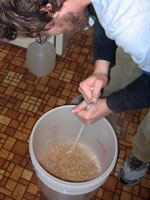
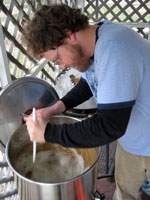
As we add the water, we must stir the mash in order to avoid any dry spots. Once about two-thirds of the strike water has been added to the malt and we are assured that the water is evenly distributed and all the malt is sufficiently wet, we can transfer the mixutre (now called the mash) to our mash tun. I uses the remaining third of the strike water to rinse every last grain out of the bucket. Our mash tun is a 10-gallon water cooler fitted with a stainless steel false bottom and a ball valve.
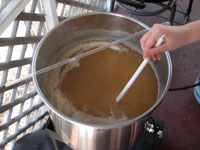
After letting the mash sit for five mintues or so to allow the heat to evenly distribute, we take a temperature reading to make sure we did the math right. The thermometer reads 152°F, which is just about right.
Now both the mash and the brewers get an hour long rest. We will be watching basketball. The enzymes in the mash will be breaking up starches into sugar.
Lautering
About ten minutes before we are ready to drain the hot, sugary liquid (called wort, but pronounced wert) from the mash tun, we add a volume of nearly boiling water to make the whole mixture less viscous. This is called mashing out.
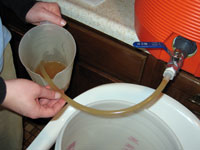
Now we’re ready to drain, the first runnings off the mash need to be put back into the mash so little solid particles of grain and husk don’t make it into brewing kettle. Boiling husk particles can cause tannins to form in the beer. That’s not cool. Tannins are for red wine, not homebrew. Once the wort from the mash tun is running pretty clear, it’s time to let it go.
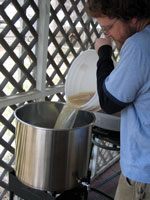
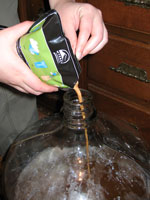
We drain the wort into a clean bucket, then pour it into the kettle. It is too dangerous moving a kettle without handles full of seven and a half gallons of 165° wort from the mash house (my kitchen) into the brew house (my back porch). I don’t believe in ill effects from hot-side aeration, so I do this with a clear conscience.
Once all the wort is out of the mash, we pour more hot water back into the mash tun to rinse the grains of as much sugar as we can. This is called sparging. We practice batch sparging, where the entire mash is drained before any new sparge water is added. This process is easier for us than fly sparging, where wort is drained at the same rate that sparge water is added.
Boiling
Once all the wort has been drained from the last sparge, it’s time to begin boiling. We ought to have about 7½ gallons in the kettle at the start of the boil. At least one gallon of that will boil away, and one gallon at the bottom will be so sludgy with hop particles and coagulated proteins (collectively called trub), that we don’t want it in the fermenter. That will leave us with at least five gallons of good liquid for yeast to turn into beer. But we are getting ahead of ourselves.
Why boil beer at all? First, and really the most important reason, it sanitizes the wort. The entire process of homebrewing is in an effort to create the perfect breeding ground for yeast to make our sugary liquid into beer. This also means that our wort is a perfect breeding ground for bacteria, wild yeast, mold and the like. None of which are going to have the desirable biproducts of good brewer’s yeast: fizz and booze.
Less important, but still desirable, boiling drives off bad flavors from the wort, which is why we never boil with the lid on. Proteins will coagulate as the wort heats. These clumps (called break) will become heavy and drop to the bottom of the wort as it cools. If we don’t get a good break, our beer will be quite turbid. (Other things cause cloudy beer, too. And sometimes it is desirable. This is just one that is not.)
The last thing that boiling accomplishes is probably the second most important. It gives us bitterness. Not directly; we do need hops. Hop alpha acids become isomerized (the atoms within the molecules are rearranged) and become stable and soluable and form bitter compounds. Which we like. Otherwise beer would be kinda sweet. But not in a good way. The longer an addition of hops boils, the more it contributes to bitterness at the expense of flavor or aroma. This recipe has two hop additions. One boils for 60 minutes. This is our bittering addition. The other will boil for 10 minutes. This is for flavor.
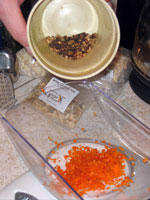
And speaking of flavor, we’re making a Begian-style witbier today, which are spiced with a variety of goodies. Traditionally, dried bitter orange peel and corriander seeds. We are using those as well as some zest from a tangelo and a few whole cloves. I don’t know what a tangelo is, but Jessica likes them, and they are much larger than an orange. Our beer will end up with a nice citrusy aroma from the zest, some citrusy flavors from our flavor hops and the orange peel. Some tartness from the sour mash will enhance and compliment all this citrus-ness.
Preparing for Fermentation
The boil is over, but the wort is still very hot. Way to hot for yeast. So, we need to cool everything down as quickly as we can. There are several methods for accomplishing this. We use an imersion chiller, a copper coil that we set in the wort and run cold water thru. This process takes about 20 to 30 minutes, which is just enough time to get our fermentation equipment ready.
Everything that touches our wort now needs to be clean and sanitized. That means tubes, the carboy, its stopper and airlock, aerator stone, thermometer, and the outside of the yeast package.
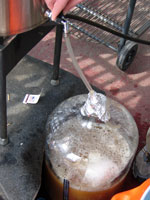
Whoops! We forgot to use our nylon hop bag to hold the orange peel, spices and hops! The pellet hops break up into powder, so that’s not a huge issue. But the pieces of peel and the whole cloves can clog the spout and tubes. We are going to have to make a whirlpool. That involves sanitizing our spoon, taking out the chiller and stirring. Really, really stirring. Stirring in the same direction for a good three or four minutes will get all the trub, pieces of peel, and cloves into suspension. As the wort whirlpool slows, it will deposit all these unwanted particles in the center of the kettle. Now, with luck, most of them won’t make their way to the spigot and clog it.
Fifteen minutes later and we have all the wort into the carboy. (Except for a sample for tasting and measuring the gravity.) The carboy goes inside and it is time to aerate. I use a aquarium pump, a hepa filter and an aeration stone, and give it at least ten minutes. Beers with higher gravities get longer aeration times, but this beer ought to be around 1.045, which is not a big beer by any means.
Because today’s witbier is on the small side, I opted not to make a starter. So, right into the fermenter from the smack-pack it goes. I’ll give it a good shake and slap on the stopper and airlock.
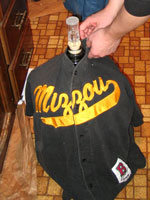
I clothe all my carboys. Not only for team pride, but also to keep sunlight out. I do most ale fermetations in the winter in my kitchen (just too cold in the basement) and sunlight does make it in. The carboy will be tucked under the counter and behind the recycle bin, but the shirt is just one more barrier from skunky beer.
Fermenting
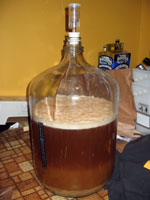
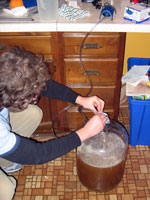
Taking a look after about 15 hours and we have life! That foam is a sign of happy yeast having a party in the beer. Soon most of the sugar we drained from the mash and boiled in the kettle will become alcohol we will pour in our tummies. I can’t wait.
Bottling
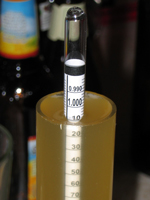

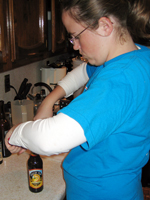
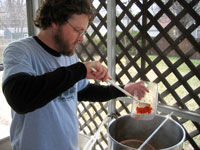
Before we bottle, we need to make sure the beer is ready to be bottled. That means taking a sample of the beer and measuring its gravity. Witbiers should finish with a specific gravity between 1.010 and 1.006. Using a tube with a one-way valve on the bottom (called a thief), we take a small sample of the beer and take a reading. Our witbier is at 1.008, which is right where it should be.
The worst part of bottling is cleaning the bottles. Of course, if I were to rise all my bottles as soon as I finished them the first time, it would be less of a hassle. A soak in Powdered Brewers Wash for a couple hours, then some scrubbing with a bottle brush will usually do the trick. Then a good rinse in clean water, and fifteen minutes with some sanitizer, and the bottles are ready.
Losing a beer to infection at this point would be hearbreaking, so sanitation is every bit as important now as it was when we were transfering the wort. The bottling bucket, siphon starter, all the tubing, the bottle wand, and the caps must be sanitized. Once they’ve had a good soak, we are ready to bottle.
Using a siphon starter, which is just a racking cane inside a tube with a one-way valve on it, we start racking the beer into the bottling bucket. (Racking just means moving the wort or beer from one vessel to another.) While aerating the wort was very important, aerating beer is disasterous. Too much air, especially oxygen, will cause the beer to go stale. Think wet cardboard. Not what we want in our beer. So racking gently, with as little splashing as possible, is the key. For added measure, we add a dash of ascorbic acid (vitamin C), which acts as an anti-oxidant.
The beer at this point is flat. The airlock which has been capping the carboy has allowed all the carbon dioxide produced by the yeast to escape. Since we don’t enjoy flat beer as much as carbonated beer, we will need to add some priming sugar to the beer before we bottle it. So, about half way thru the racking, we add a measure of corn sugar that has been disolved and boiled with a cup of water to kill off any microbes. This added sugar will be eaten by yeast still in suspension within the beer. The small amount of sugar will be just enough to carbonate the beer.
So now, all the beer is in the bottling bucket, the priming sugar is mixed in, the bottles and all the equipment are sanitized. We are ready! Attached to the bucket is a bottling wand, a thin, rigid plastic tube with a small valve on the bottom. When it is pressed against the bottom of a bottle, the valve will open and fill the bottle with beer. When the bottle is removed, the valve closes. Once the bottle is full, a sanitized crown cap is placed on the top and crimped closed. Easy enough, now we’ll need to repeat another 47 times.
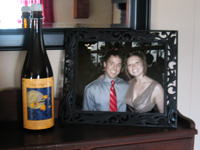
One bottle of this witbier will be given to Jessica’s sister for her honeymoon, so we are going to give her a special bottle. We fill a large bottle and cork it with a plastic “cork”. It’ll look much nicer than a normal 12-oz. bottle with a crown.
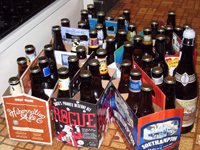
We filled 42 12-ounce bottles, plus the larger 25-ounce bottle for Jessica’s sister. A good run, with very few spills or overflows. Now we must wait patiently for a couple of weeks for the yeast to complete fermenting the priming sugar. Then we will have delicious, fizzy, citrusy, wheat beer goodness.
Enjoying
Mmm!


